Chinese Dragon Puppet
- Nathan's Network

- Feb 17, 2018
- 3 min read

In honor of Chinese New Year, we decided to make a Chinese Dancing Dragon. Heads up...if you decide to make this, allow several days for the process or be prepared to do a lot of "prep" work.
Supplies Needed:
General-
Glue
Hot glue and glue gun
Scissors
Paint Brush
Body-
An embroidery hoop cut in half (You will end up with 4 half circles)
Red and gold tissue paper
Glitter
Light Decorative Items (Like the fuzzy balls on our dragon)
Skewers
Head-
A paper mache form made from a balloon. (Tutorial here.)
Red, white, and black paint
Gold tissue paper
Tube from inside plastic wrap (or foil/waxed paper/parchment paper etc.)
Curling ribbon
4 pieces cut from an egg carton:

Card stock
This template (Or you can draw your own pieces):

Putting the Head Together
1. Cut a mouth out of your paper mache form and paint it red. (Be sure that your paper mache is dry before doing this.) It will look like this. (Ours WASN'T dry, hence the stuffing in the mouth.)

2. Set aside to dry.
3. Cut out template pieces from card stock. Be sure to cut at least 2 eyebrow ridges, 2 horns, 2 ears and 2 of the "wings". For ours, we cut 6 wings. Also cut out as many teeth as you would like.
4. Put glitter on any pieces you would like, and leave to dry. (We used a tub to try to contain the glitter.)
5. Use the black and white paint to paint the egg carton pieces. For the bigger pieces, use white around the edges and black in the middle to make an eye. Paint the smaller ones black to be nostrils.
6. Glue teeth in the dragon's mouth.
7. Cut scales from gold tissue paper and glue on the top and down the back of the dragon's head. (Optional)
8. Fold dragon's ear triangle in half. Put hot glue along the bottom edge and press the ears onto the head. Hold until the glue has dried, or it will fall off. Since it is hot glue, it will only take about 1 minute to dry.
9. Glue horns on the side of the dragon's head.
10. Glue wings on the side of the dragon's head. We glued ours together first, like this:

11. Glue curling ribbon to the dragon's chin to make a "beard".
12. Cut strips of gold tissue paper and glue to the inside of the dragon's mouth to make "fire".
12. Glue plastic wrap tube to the bottom of the dragon's head to be a handle.
Putting the Body Together
1. Lay out a piece of red tissue paper. Put hot glue along the outside edge of a piece of embroidery hoop and roll it over the paper. You should have some tissue paper dangling down. Upside down, it will look like this:

2. Repeat with the other three pieces of hoop, trying to make them evenly spaced.
3. Glue more tissue paper over the original tissue paper to make the dragon's body more opaque. Layer gold and red paper for more interest.
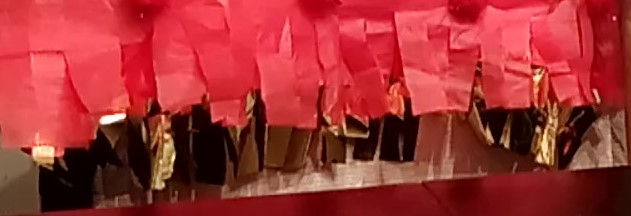
4. Cut strips in the bottom of the paper on both sides to give the dragon a "fringed" look.

5. Add any other lightweight decorations that you want. We added fuzzy balls and strips of gold paper down the dragon's back.
6. Glue skewers to the bottom ends of the embroidery hoop halves. Be sure to point the pointy end upwards or you can cut it off before this stage. Attach at least 4 sticks...one at each side of the last hoop at the front and the last hoop at the back.
At this point, you can choose to glue the body to the head, or leave the two pieces separate. You can now make him dance. (We had way too much fun with this part...click to watch him in action below.)


Comments